def say_gday(
greeting:str="G'day", # Greeting to use
strine:bool=True, # Use incomprehensible Aussie accent?
dropbears:bool=False): # Also warn about drop-bears?
"Says g'day, the classic Aussie greeting"
...Docs Website
How nbdev renders a documentation website for your project.
Concepts
Source Files
There are two mediums in which you can author documentation in nbdev:
- Jupyter Notebooks
- Quarto Markdown (.qmd)
For most cases, you will use Jupyter Notebooks. However, you may choose to author a document in Quarto Markdown if there is no code on that particular page. When in doubt, we recommend using notebooks as they are more versatile.
In the case of notebooks, nbdev pre-processes them to add, remove or change the content before passing it to Quarto. In some cases, nbdev even executes certain cells in order to render the documentation properly. The mechanics of this are discussed in the Notebook Processor section below.
For markdown files, Quarto renders these directly.
Notebook Processor
Nbdev does special pre-processing on notebooks based on the following:
- Directives: Directives are special comments that allow you to perform operations on cells. For example, the comment
#|hideallows you to hide cell inputs and outputs. You can read more about directives on this page. Directives that are unique to nbdev and not supported by Quarto are removed from the notebook before being passed to Quarto. - Front Matter: Front matter allows you to specify document-level options so you don’t have to repeat them on each cell. (Similarly,
_quarto.ymlallows you to specify project-level options.) You can read more about Quarto front-matter here.
The directives and front-matter are used by a Processing Pipeline to transform notebooks. Many of these pre-processing steps are defined in nbdev.processors, which are then run by nbdev.process.NBProcessor. Some of these pre-processing steps involve running code (with execnb) in order to dynamically render API documentation. This process is explained in the How show_doc works section below.
When generating your docs site, the intermediate output of these pre-processed notebooks and other quarto project files are saved into a directory named _proc/ at the root of your repo. You can inspect the _proc/ directory in order to debug or understand how notebooks are pre-processed.
Quarto
Quarto is the mechanism nbdev uses to generate web pages from notebooks. It is useful to visit the Quarto docs and understand how it works. nbdev automatically generates the Quarto configuration files _quarto.yml and sidebar.yml for you.
You can override any settings in _quarto.yml by defining a custom.yml file. This is explained further in the Customizing Quarto section. We explain how to customize your sidebar in the Customizing The Sidebar section.
Static Site
Quarto has a built-in static site generator that will generate HTML, Javascript and CSS files. These files will be placed in the doc_path directory as specified in your project’s pyproject.toml, which is _docs/ by default.
Overview
Below is a diagram on how these concepts fit together.

Customizing Quarto
You can create a custom.yml file in the same location as your _quarto.yml file to override any values in _quarto.yml. For example, assume your _quarto.yml file looks contains this:
website:
  title: "nbdev"
  site-url: "https://nbdev.fast.ai/"
  description: "Create delightful software with Jupyter Notebooks"
  twitter-card: true
  open-graph: true
  repo-branch: master
  repo-url: "https://github.com/fastai/nbdev"
  repo-actions: [issue]
  navbar:
    background: primary
    search: true
    right:
      - icon: github
        href: "https://github.com/fastai/nbdev"
  sidebar:
    style: "floating"
Let’s assume you want to customize your sidebar navigation options such that instead of “floating” for sidebar.style, you wanted your navbar to be “docked”. Additionally, lets assume you want a different background color using the sidebar.background field which is not in the configuration above.
To accomplish these tasks, you would create a custom.yml in the same location as _quarto.yml with these contents:
website:
  sidebar:
      style: "docked"
      background: "dark"
Note
You can also set custom_quarto_yml = true in [tool.nbdev] in pyproject.toml if you wish to edit _quarto.yml directly instead of overriding settings in custom.yml.
Multiformat Branding with _brand.yml
Quarto supports _brand.yml- a single YAML file that can be used to standardize the appearance of your documentation across formats.
To use this specification, you would create a brand.yml in the same location as _quarto.yml with these contents:
color:
  palette:
    dark-grey: "#222222"
    blue: "#ddeaf1"
  background: blue
  foreground: dark-grey
  primary: black

logo:
  small: favicon.png

typography:
  fonts:
    - family: Jura
      source: google
  base: Jura
  headings: Jura
This file will then change the appearance of your documentation, across formats, to include the fonts, colors and logos specified in the file.
How show_doc works
When your documention website is built, all functions and classes you export to source code will be automatically documented with show_doc. This function outputs a summary of the symbol, showing its signature, docstring, and parameters. For instance, if you have this function:
This is how it’s rendered in the documentation, by automatically generating a temporary cell containing:
show_doc(say_gday)say_gday
def say_gday(
    greeting:str="G'day", # Greeting to use
    strine:bool=True, # Use incomprehensible Aussie accent?
    dropbears:bool=False, # Also warn about drop-bears?
):
Says g’day, the classic Aussie greeting
Because this is done automatically any time you build your docs (including automatically by continuous integration), your documentation will always contain current information about your code.
You can also document code that’s not created in a notebook, by using show_doc with imported code. For instance, if we wanted to document release_conda, we can import it and call show_doc(release_conda):
from nbdev.release import release_conda
show_doc(release_conda)release_conda
 release_conda (path:str='conda', do_build:<function bool_arg>=True,
                build_args:str='', skip_upload:<function
                store_true>=False, mambabuild:<function store_true>=False,
                upload_user:str=None)
Create a meta.yaml file ready to be built into a package, and optionally build and upload it
| Type | Default | Details | |
|---|---|---|---|
| path | str | conda | Path where package will be created |
| do_build | bool_arg | True | Run conda build step |
| build_args | str | Additional args (as str) to send to conda build |
|
| skip_upload | store_true | False | Skip anaconda upload step |
| mambabuild | store_true | False | Use mambabuild (requires boa) |
| upload_user | str | None | Optional user to upload package to |
Automatic Cell Execution
When your documentation is built, all your manually added show_doc cells are run automatically. nbdev also executes all cells containing an import statement, and all exported cells – that way we can be sure that the symbol used in your show_doc cell is available.
We don’t, however, execute any other cells. That’s because you wouldn’t want to wait for your entire notebook to run just to build your docs; for instance, your docs might demonstrate training a model which takes hours to complete!
This leads to an important rule when authoring nbdev notebooks:
Warning
Do not mix import statements (or calls to show_doc) with other code in a single cell. If you do, all the code in that cell will be executed every time you build your docs, which might lead to errors (since not all previous cells will have been executed.
Instead, put your imports in separate cells, and calls to show_doc should contain only that one line of code – the show_doc call.
Note that nbdev automatically hides the actual show_doc(...) line of code. So your users only see the output.
Forcing Cells To Execute
Sometimes you may want to execute additional cells beyond what is automatically executed by nbdev. For instance, on our Getting Started page we show a list of all nbdev commands, automatically generated with nbdev-help. We want this page to always have the most up to date list of commands and docs, so we want it to always execute when the docs are rendered. To do that, add the following directive to the top of a cell:
#| exec_docAlternatively, you can get nbdev to automatically execute all cells when rendering your docs, by adding the following to your notebook frontmatter:
---
exec_all: true
---
Skipping Execution
Likewise, you can instruct nbdev to not execute any cells when rendering your docs with the following front matter:
---
skip_showdoc: true
---
Or ignore execution for a specific cell with this directive:
#| eval: falseWhy use show_doc?
Many Python developers use sphinx autodoc to automatically document a whole module all at once. Whilst this can work reasonably well, we think there are huge benefits for both developers and users in using nbdev’s approach instead
The premise of nbdev’s approach is that your documentation is important enough to be worth you taking the time to think carefully though each thing you want to show your users, what examples you’re going to provide, maybe adding some images to explain more complex ideas, and so forth. Jupyter provides a terrific environment for creating just these kinds of documents. For instance, with Jupyter you can:
- Paste images directly from your clipboard into a cell
- Insert code and have it executed and the results displayed to users
- Create a hierarchy of headings to help structure your page
- …and much more.
With show_doc, you can insert automatically-updated API details for your library anywhere in a page. That means that you get to decide exactly how your page should look, and what information is provided where. You don’t have to limit yourself to the limits of ASCII art for diagrams, and can include full end-to-end code walk-through of the processes your users will be following.
Previewing Your Site Locally
You can preview your docs anytime by running nbdev-preview. While in preview mode, you can make updates to notebooks and it will be reflected (after a small delay) in your browser.
Deploying Docs With GitHub Actions
If your nbdev project lives in GitHub, we include automation that deploys your documentation site for you on GitHub Pages.
nbdev comes bundled with a workflow file that enables this automation. This workflow is automatically triggered whenever you change any of the content in your repo. The following GitHub Actions workflows will run to generate a docs site (in this order):
Deploy to GitHub Pages: This workflow builds the docs with nbdev. This is defined in deploy.yaml and references AnswerDotAI/workflows/quarto-ghp3.pages build and deployment: This is an internal built-in workflow that GitHub provides whenever GitHub pages are enabled.
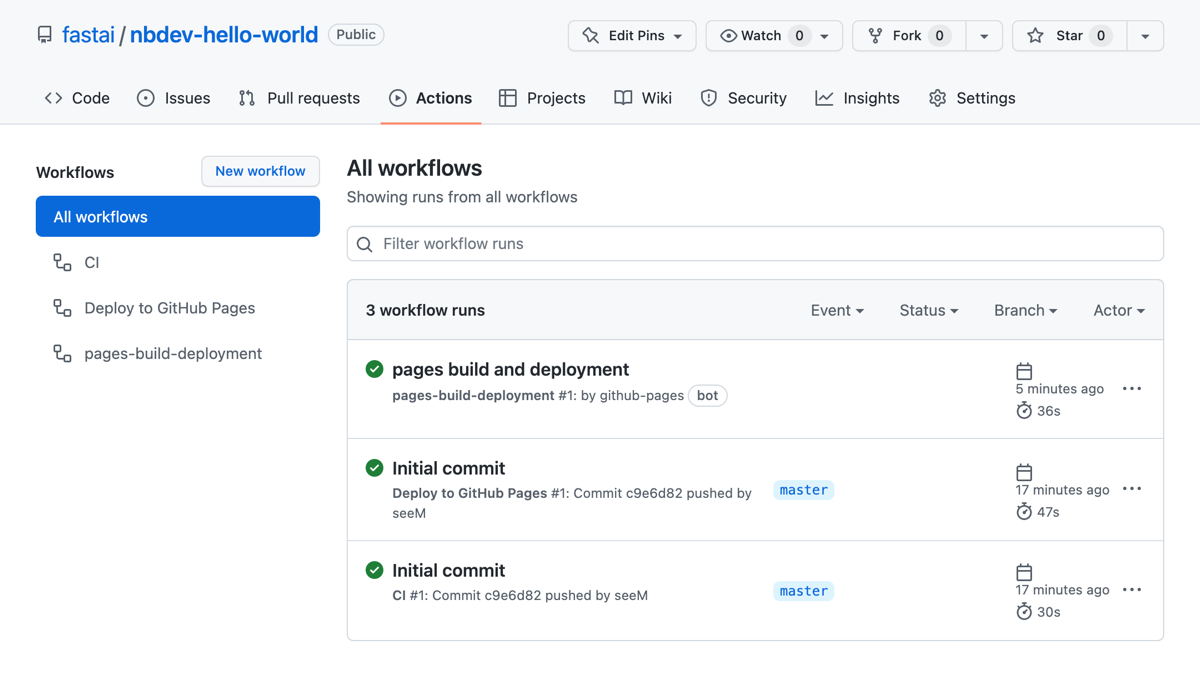
Should anything go wrong in your page build, you can always look at the logs of these workflows. Like other workflows, these can be found in the Actions tab of your repo:
To read more about GitHub Actions, see their docs.
Deploying Your Docs On Other Platforms
You can generate all of the static assets for your site (html, css, etc) by running the command nbdev-docs. After running this command, all of the files for your documentation site will be located in the _docs/ directory (the location is configurable by doc_path in pyproject.toml) at the root of your repository. This directory is not checked into git and is ignored by .gitignore, but you can use these files to deploy to any hosting platform you want.
You can also use the quarto publish command to render your docs on a wide variety of other platforms, which is discussed in the Quarto docs here. After running the command nbdev-docs, the quarto publish command must be run from the root of the _proc/ directory, which is located at the root of your repo. The built-in help of quarto publish provides a good overview of the various targets available:
ImportantCall
nbdev-proc-nbs and publish from the _proc/ directory
To use quarto publish with nbdev, you must run the nbdev-proc-nbs command to pre-process your notebooks before publishing your docs. As a reminder, nbdev-proc-nbs creates the directory _proc/ at the root of your project that Quarto uses to render your site.
For example, to publish a site to Netlify you can run the following command from the root of your repo:
nbdev-proc-nbs && cd _proc && quarto publish netlify!quarto publish -h
  Usage:   quarto publish [provider] [path]
  Version: 1.1.75


  Description:

    Publish a document or project. Available providers include:

     - Quarto Pub (quarto-pub)
     - GitHub Pages (gh-pages)
     - RStudio Connect (connect)

     - Netlify (netlify)
    Accounts are configured interactively during publishing.
    Manage/remove accounts with: quarto publish accounts

  Options:

    -h, --help              - Show this help.
    --id          <id>      - Identifier of content to publish
    --server      <server>  - Server to publish to
    --token       <token>   - Access token for publising provider
    --no-render             - Do not render before publishing.
    --no-prompt             - Do not prompt to confirm publishing destination
    --no-browser            - Do not open a browser to the site after publishing
    --log         <level>   - Path to log file
    --log-level   <level>   - Log level (info, warning, error, critical)
    --log-format  <format>  - Log format (plain, json-stream)
    --quiet                 - Suppress console output.

  Commands:

    help  [command]  - Show this help or the help of a sub-command.

  Examples:

    Publish project (prompt for provider):  quarto publish
    Publish document (prompt for provider): quarto publish document.qmd
    Publish project to Netlify:             quarto publish netlify
    Publish with explicit target:           quarto publish netlify --id DA36416-F950-4647-815C-01A24233E294
    Publish project to GitHub Pages:        quarto publish gh-pages
    Publish project to RStudio Connect:     quarto publish connect
    Publish with explicit credentials:      quarto publish connect --server example.com --token 01A24233E294
    Publish without confirmation prompt:    quarto publish --no-prompt
    Publish without rendering:              quarto publish --no-render
    Publish without opening browser:        quarto publish --no-browser
    Manage/remove publishing accounts:      quarto publish accounts